> ## Documentation Index
> Fetch the complete documentation index at: https://docs.enad.io/llms.txt
> Use this file to discover all available pages before exploring further.
# Attributes
> Understand attribute templates and attributes.
Attributes let you describe your catalog with structured, reusable values such as **Color**, **Size**, **Material**, or **Season**. Instead of typing free text on every product, you define a value once and attach it wherever it's needed. This keeps your data consistent and makes attributes usable for filtering, translations, and storefront display.
## The core idea
There are two building blocks. Understanding the difference between them is the key to using attributes well.
A reusable **group** of related options, plus the rules for how those
options are described. Think **Color**, **Size**, or **Material**.
A single **option** inside a template. Think **Red**, **XL**, or **Cotton**.
This is what you actually attach to a product.
A simple way to remember it:
> The **template** is the question ("What color is it?"). The **attribute** is the answer ("Red").
### Example
```text theme={null}
Template: Color
├─ Attribute: Sand Beige
├─ Attribute: Forest Green
└─ Attribute: Black
Template: Size
├─ Attribute: S
├─ Attribute: M
└─ Attribute: L
```
A product such as a *Wool Sweater* might then carry the attributes `Color / Forest Green` and `Size / M`.
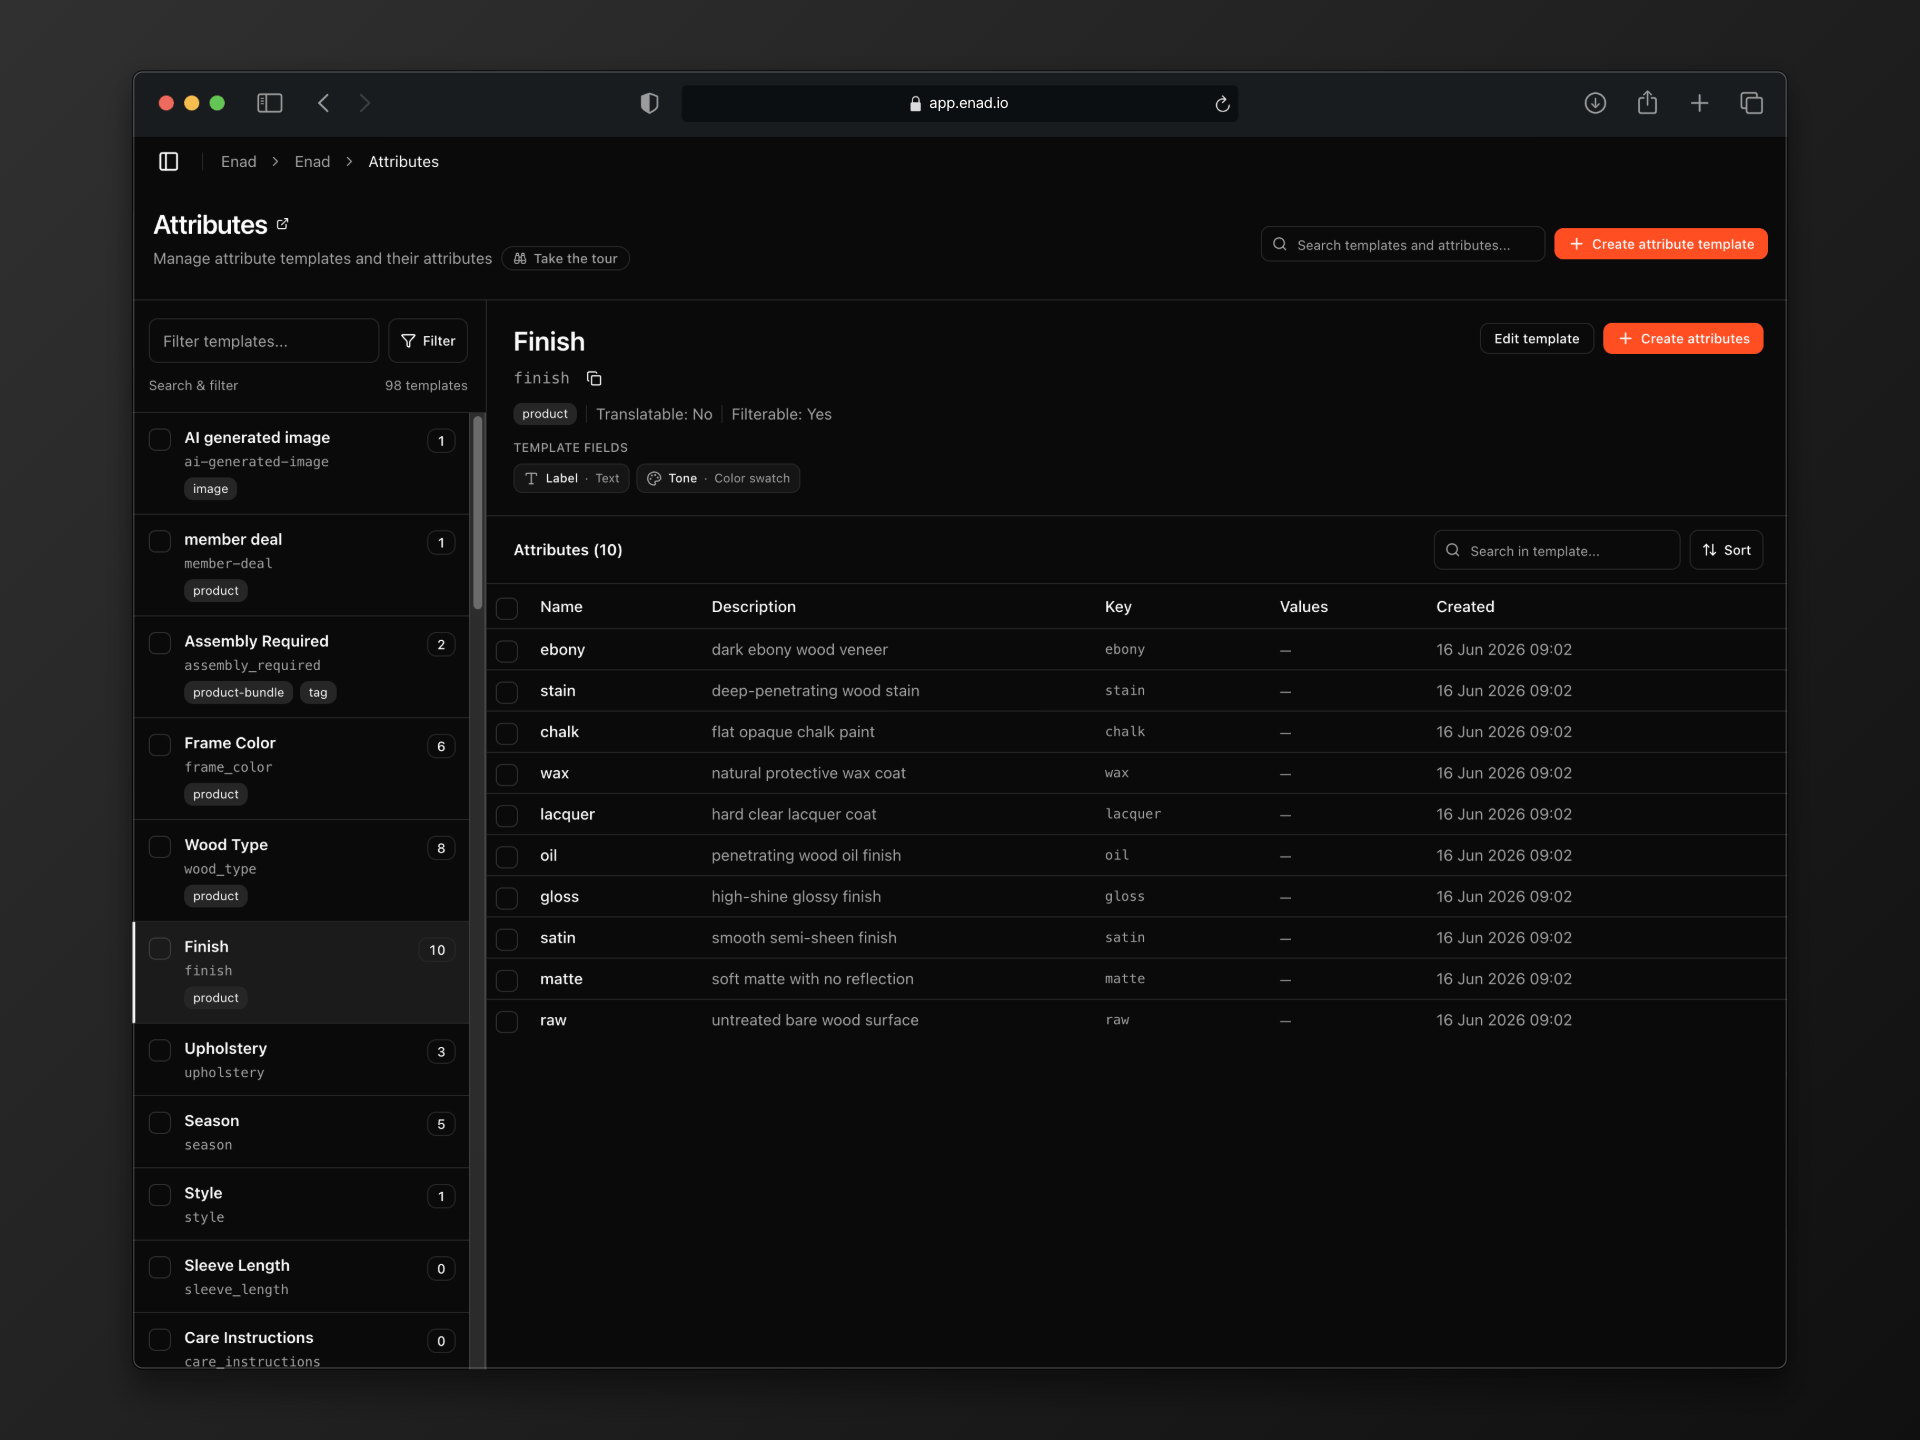
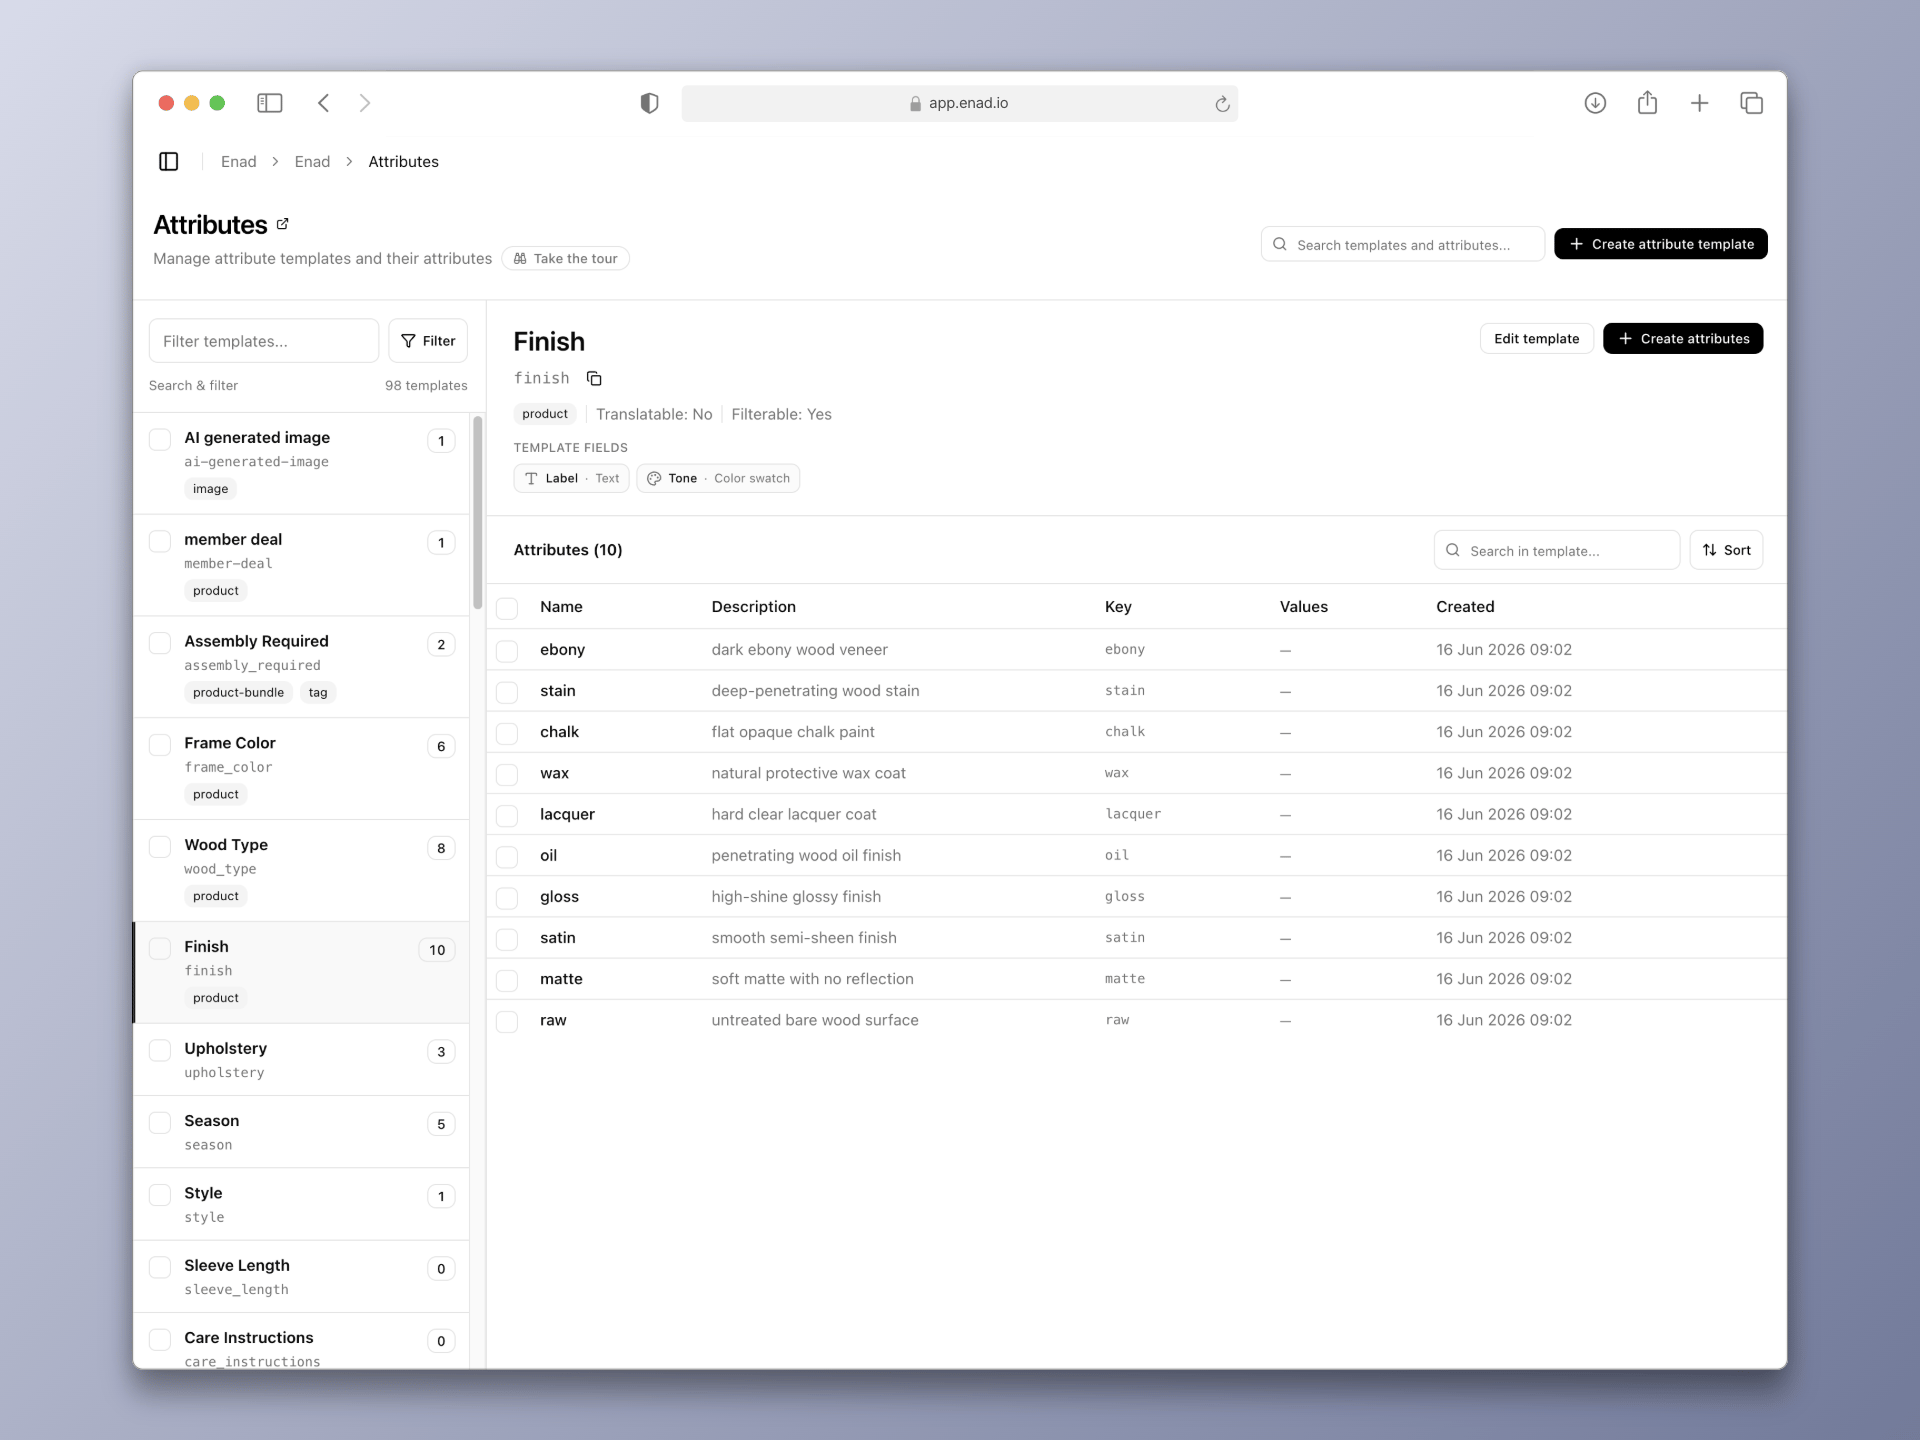 ## Anatomy of a template
When you create a template, you configure a few settings that apply to every attribute inside it.
| Setting | What it does |
| ---------------- | --------------------------------------------------------------------------------------------------------------------- |
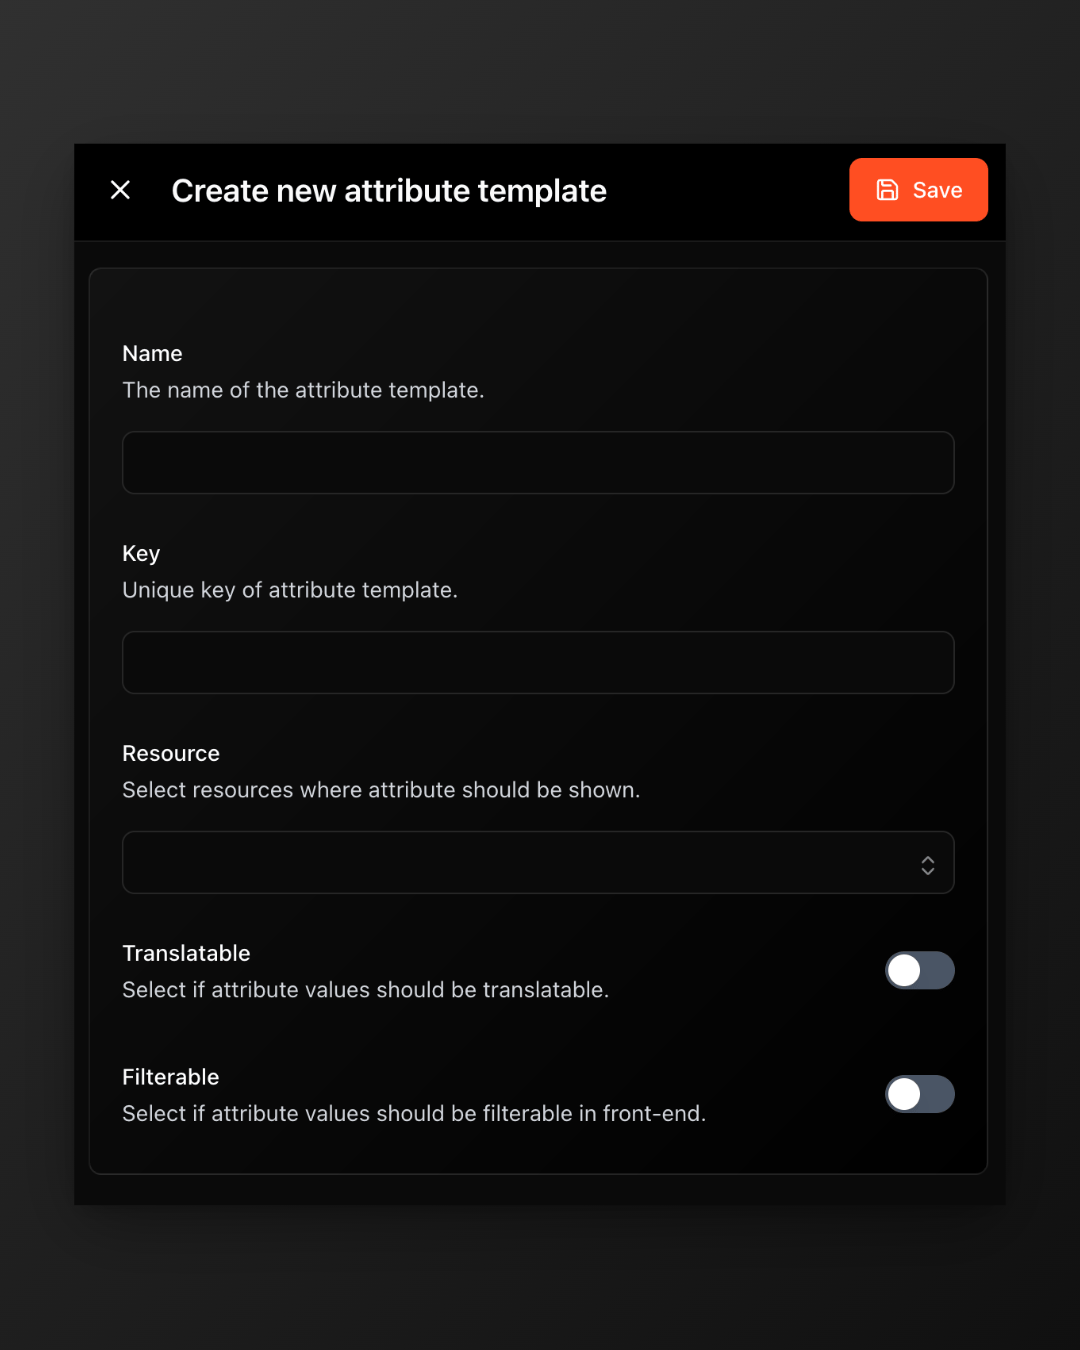
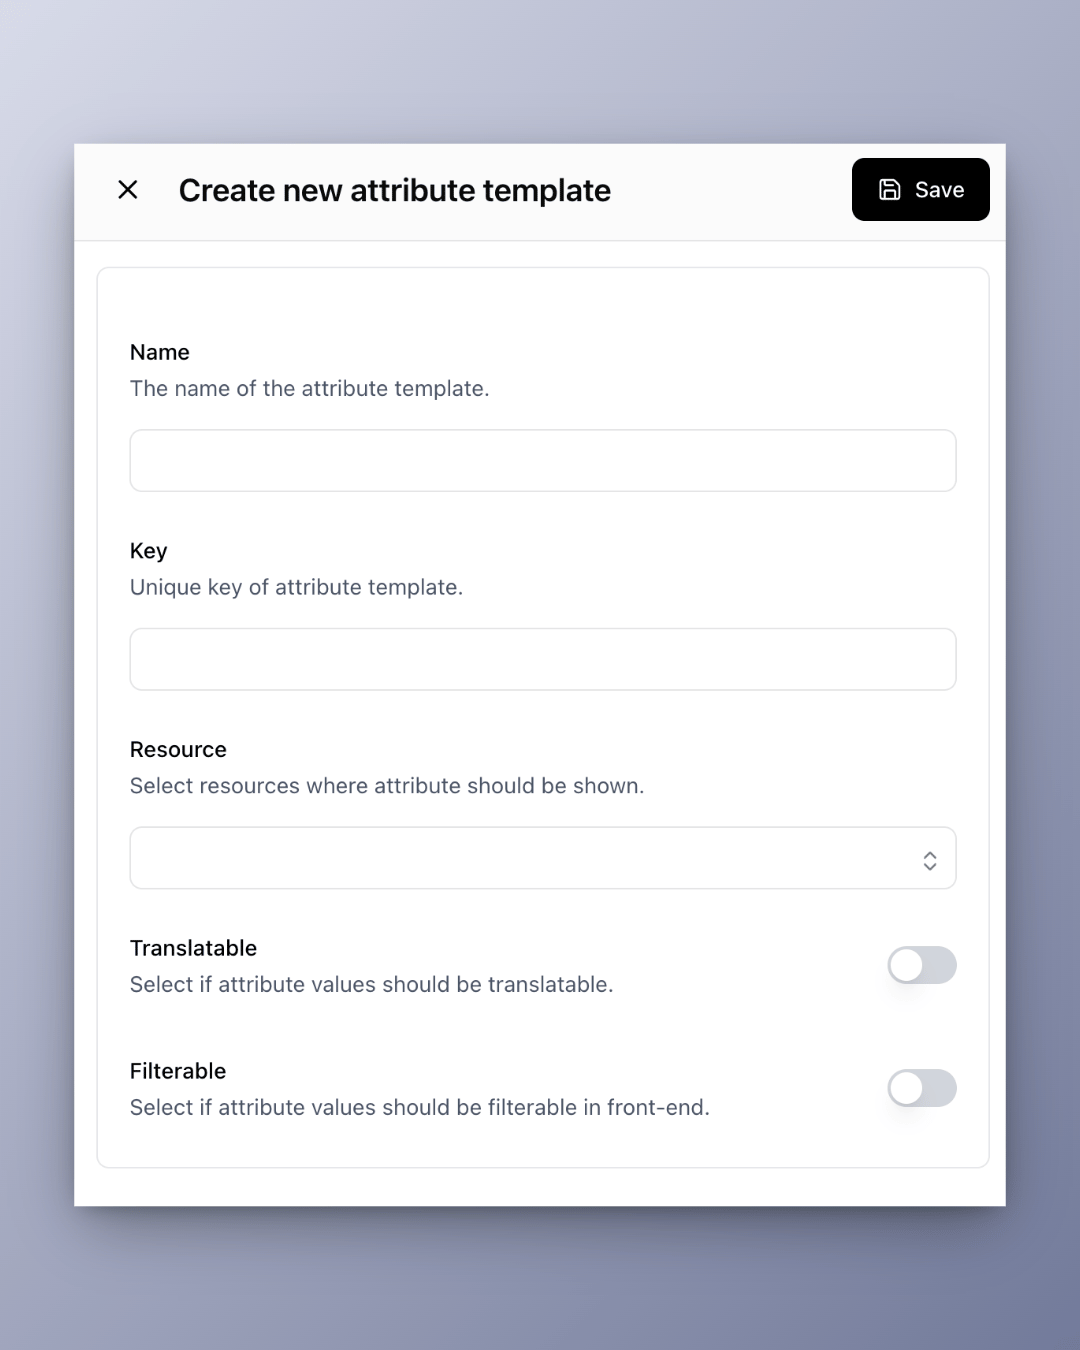
| **Name** | The human-readable label, e.g. `Color`. |
| **Key** | A unique, machine-friendly identifier, auto-generated from the name (e.g. `color`). Used by the API and integrations. |
| **Resources** | Which entity types can use this template. Pick one or more from the [supported resources](#supported-resources) list. |
| **Filterable** | Makes the attribute values available as filters on the storefront. |
| **Translatable** | Allows each attribute's values to be translated into your other languages. |
| **Fields** | Extra pieces of data captured for each option (see [Fields](#fields-extra-data-on-each-option)). |
The **key** must be unique and is hard to change later because integrations
rely on it. Pick a clear name up front and let the key follow from it.
## Fields: extra data on each option
By default, every attribute already has a **name**, **key**, and **description**. Fields let you attach *additional* structured data to each option in a template.
The classic example is the **Color** template: the option is named `Forest Green`, but you also want to store the exact hex color (shown as a swatch) and perhaps a real image of the material. You'd add a `color` field and an `image` field to the template, and then fill them in for each option.
Available field types:
| Field type | Use it for |
| ----------- | --------------------------------------------------------- |
| **Text** | Short free-text values, codes, or labels. |
| **Number** | Numeric values such as weight, capacity, or thread count. |
| **Boolean** | Yes/no flags such as "Waterproof". |
| **Color** | A color value (hex), rendered as a swatch. |
| **Image** | An actual image picked from your app's assets. |
The field keys `key`, `name`, and `description` are reserved, because every
attribute already has those. You can't reuse them as custom field keys.
## Anatomy of a template
When you create a template, you configure a few settings that apply to every attribute inside it.
| Setting | What it does |
| ---------------- | --------------------------------------------------------------------------------------------------------------------- |
| **Name** | The human-readable label, e.g. `Color`. |
| **Key** | A unique, machine-friendly identifier, auto-generated from the name (e.g. `color`). Used by the API and integrations. |
| **Resources** | Which entity types can use this template. Pick one or more from the [supported resources](#supported-resources) list. |
| **Filterable** | Makes the attribute values available as filters on the storefront. |
| **Translatable** | Allows each attribute's values to be translated into your other languages. |
| **Fields** | Extra pieces of data captured for each option (see [Fields](#fields-extra-data-on-each-option)). |
The **key** must be unique and is hard to change later because integrations
rely on it. Pick a clear name up front and let the key follow from it.
## Fields: extra data on each option
By default, every attribute already has a **name**, **key**, and **description**. Fields let you attach *additional* structured data to each option in a template.
The classic example is the **Color** template: the option is named `Forest Green`, but you also want to store the exact hex color (shown as a swatch) and perhaps a real image of the material. You'd add a `color` field and an `image` field to the template, and then fill them in for each option.
Available field types:
| Field type | Use it for |
| ----------- | --------------------------------------------------------- |
| **Text** | Short free-text values, codes, or labels. |
| **Number** | Numeric values such as weight, capacity, or thread count. |
| **Boolean** | Yes/no flags such as "Waterproof". |
| **Color** | A color value (hex), rendered as a swatch. |
| **Image** | An actual image picked from your app's assets. |
The field keys `key`, `name`, and `description` are reserved, because every
attribute already has those. You can't reuse them as custom field keys.
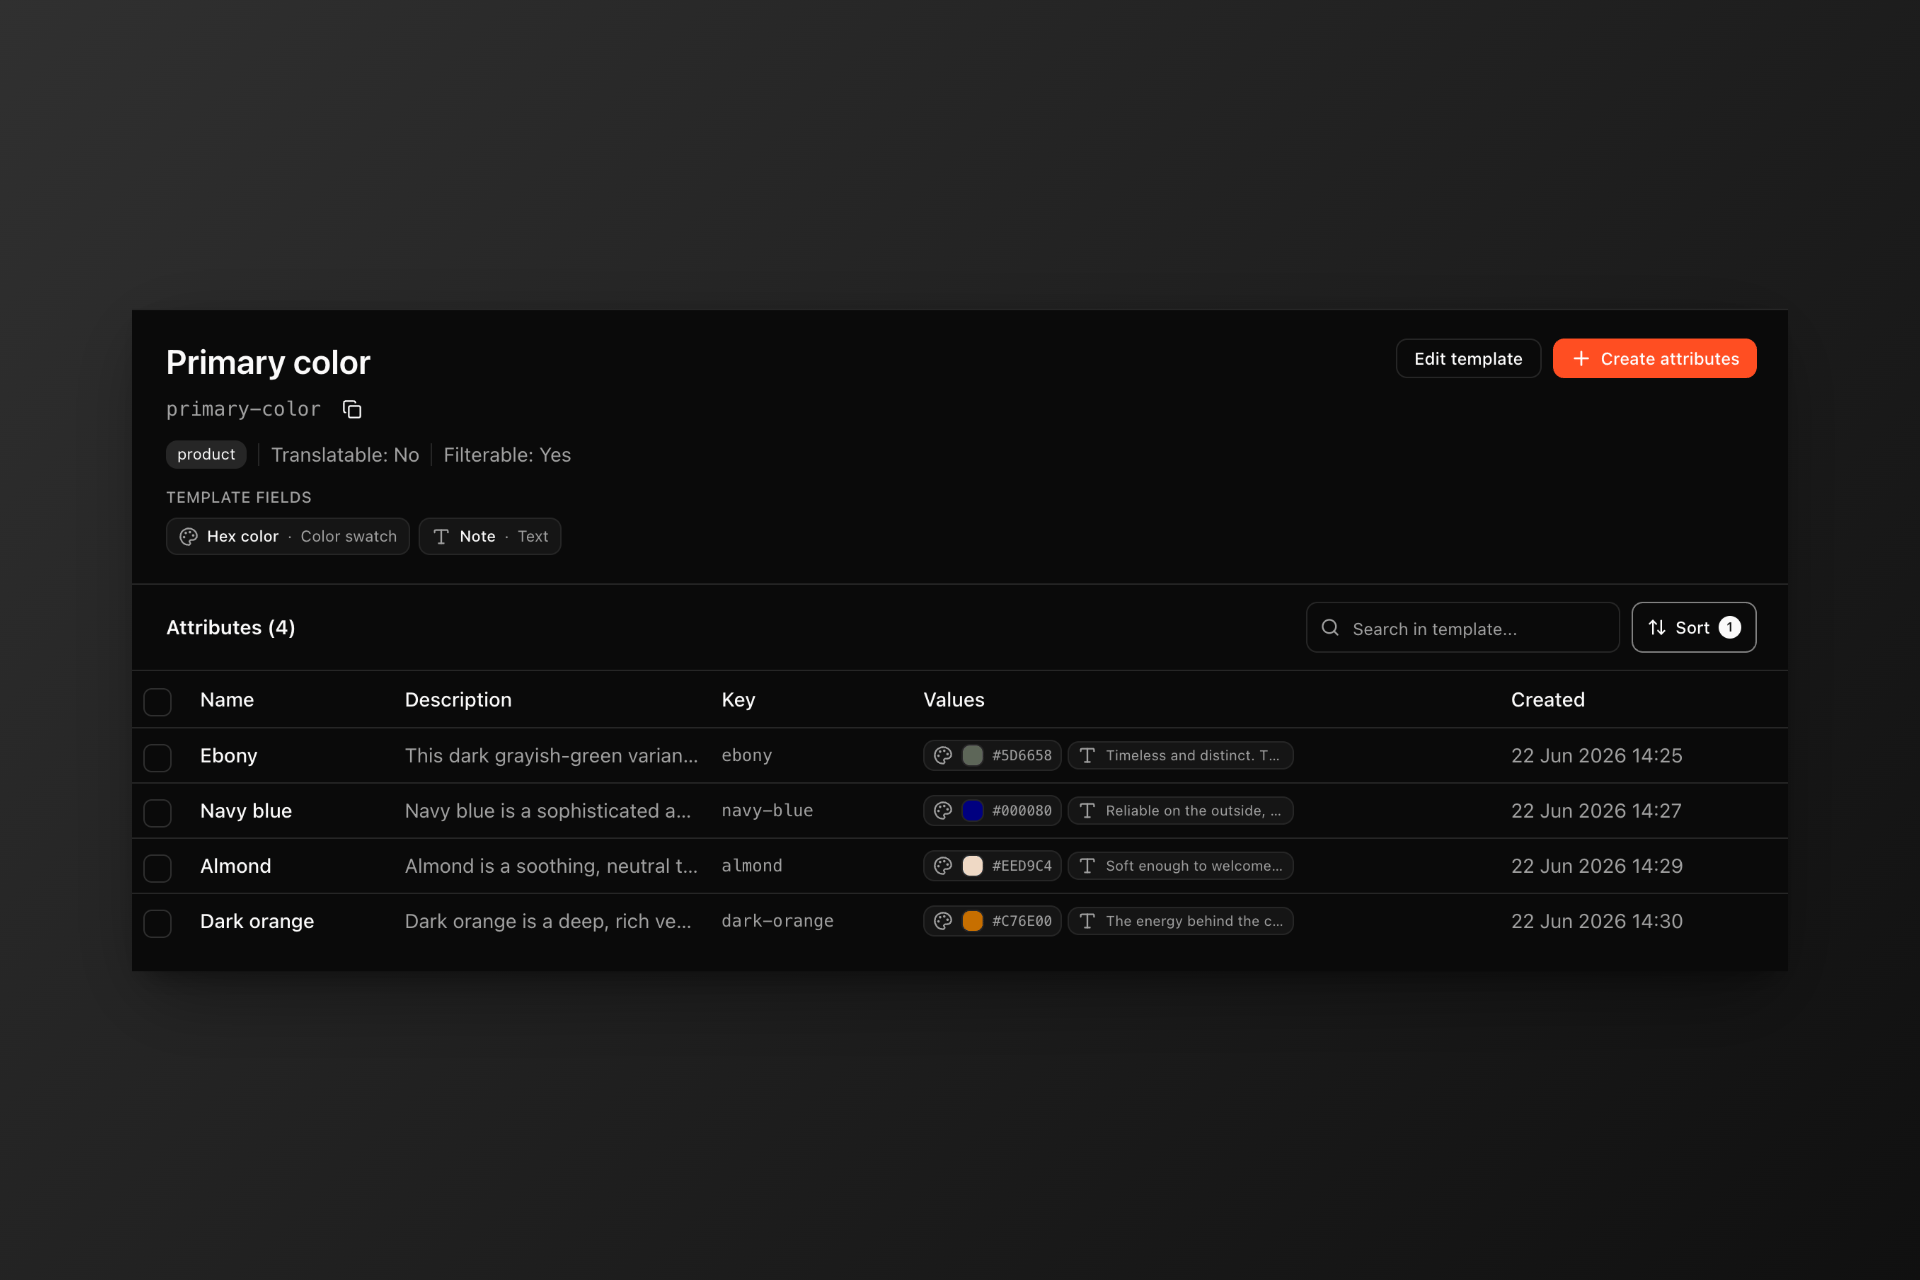
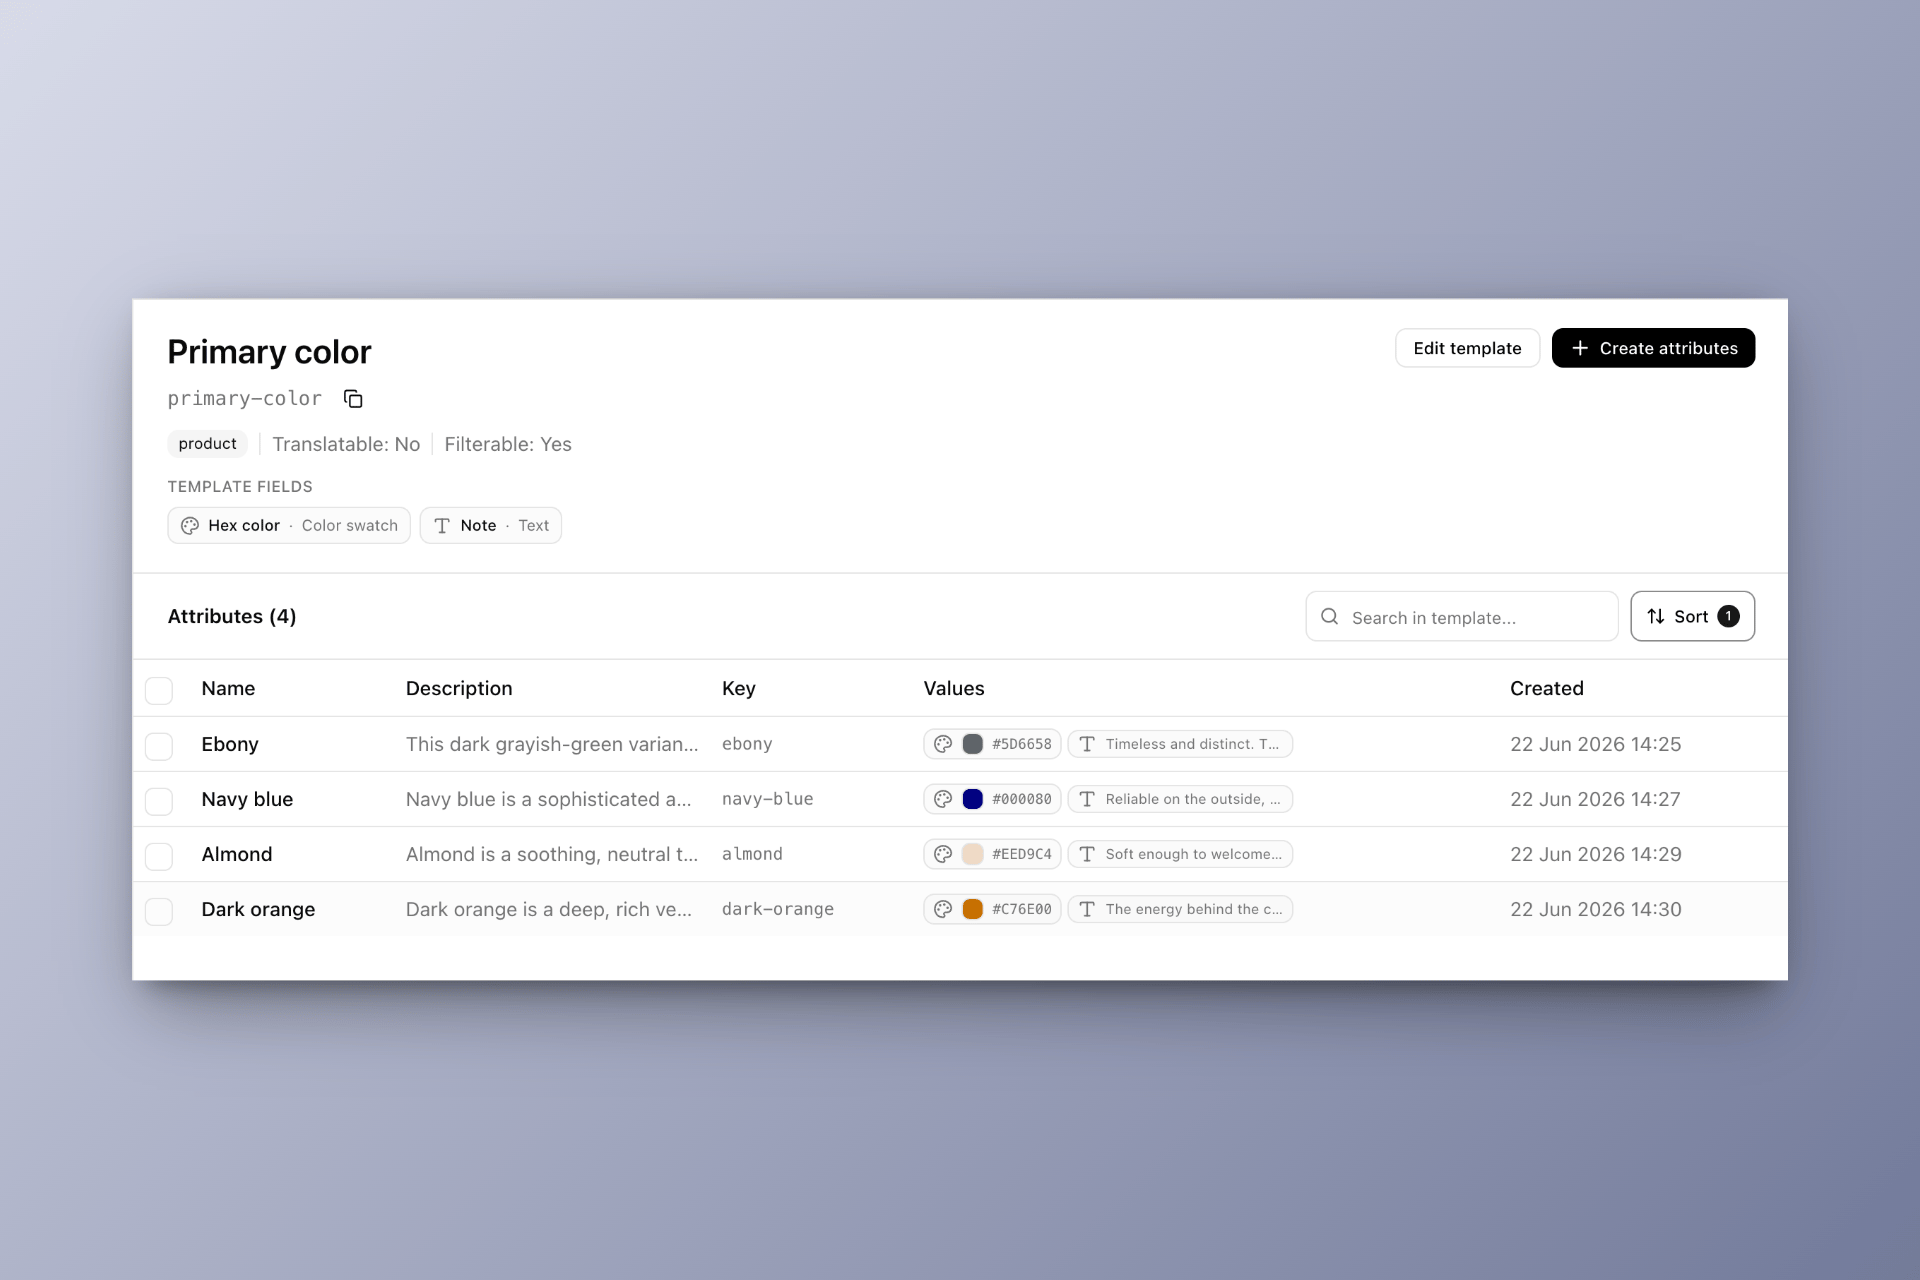 ## Supported resources
When you create or edit a template, the **Resources** field is where you choose which entity types can use its attributes. In the dashboard this appears as a multi-select on the template form; each option is one of the resource types below.
Attributes aren't limited to products. The same template model works across every supported resource:
* **Product**
* **Product variant**
* **Tag**
* **Asset** (image, video, and file)
* **Category**
* **Organisation**
* **Merchant user**
* **Product bundle**
A template is defined once at the application level and made available only on the resources you select. For example, a `Color` template might apply to products and variants, while a `Department` template applies only to merchant users.
## Linked attributes
You can **link** an attribute to another attribute in a different template. When two attributes are linked, attaching one to an item automatically attaches the other.
A common use: link `Color / Forest Green` to a `Theme / Earth Tones` attribute, so that every product tagged with that color also gets the matching theme without extra work. Unlinking them stops the automatic behavior; it doesn't remove attributes already attached.
## Typical workflow
Go to **Products → Attributes** and create a new attribute template. Give it a name (e.g. `Color`), choose which [resources](#supported-resources) it applies to, and decide whether it should be filterable and/or translatable.
## Supported resources
When you create or edit a template, the **Resources** field is where you choose which entity types can use its attributes. In the dashboard this appears as a multi-select on the template form; each option is one of the resource types below.
Attributes aren't limited to products. The same template model works across every supported resource:
* **Product**
* **Product variant**
* **Tag**
* **Asset** (image, video, and file)
* **Category**
* **Organisation**
* **Merchant user**
* **Product bundle**
A template is defined once at the application level and made available only on the resources you select. For example, a `Color` template might apply to products and variants, while a `Department` template applies only to merchant users.
## Linked attributes
You can **link** an attribute to another attribute in a different template. When two attributes are linked, attaching one to an item automatically attaches the other.
A common use: link `Color / Forest Green` to a `Theme / Earth Tones` attribute, so that every product tagged with that color also gets the matching theme without extra work. Unlinking them stops the automatic behavior; it doesn't remove attributes already attached.
## Typical workflow
Go to **Products → Attributes** and create a new attribute template. Give it a name (e.g. `Color`), choose which [resources](#supported-resources) it applies to, and decide whether it should be filterable and/or translatable.
 If each option needs extra data, like a hex color or an image from your assets, add the relevant fields to the template.
{/*
If each option needs extra data, like a hex color or an image from your assets, add the relevant fields to the template.
{/*  */}
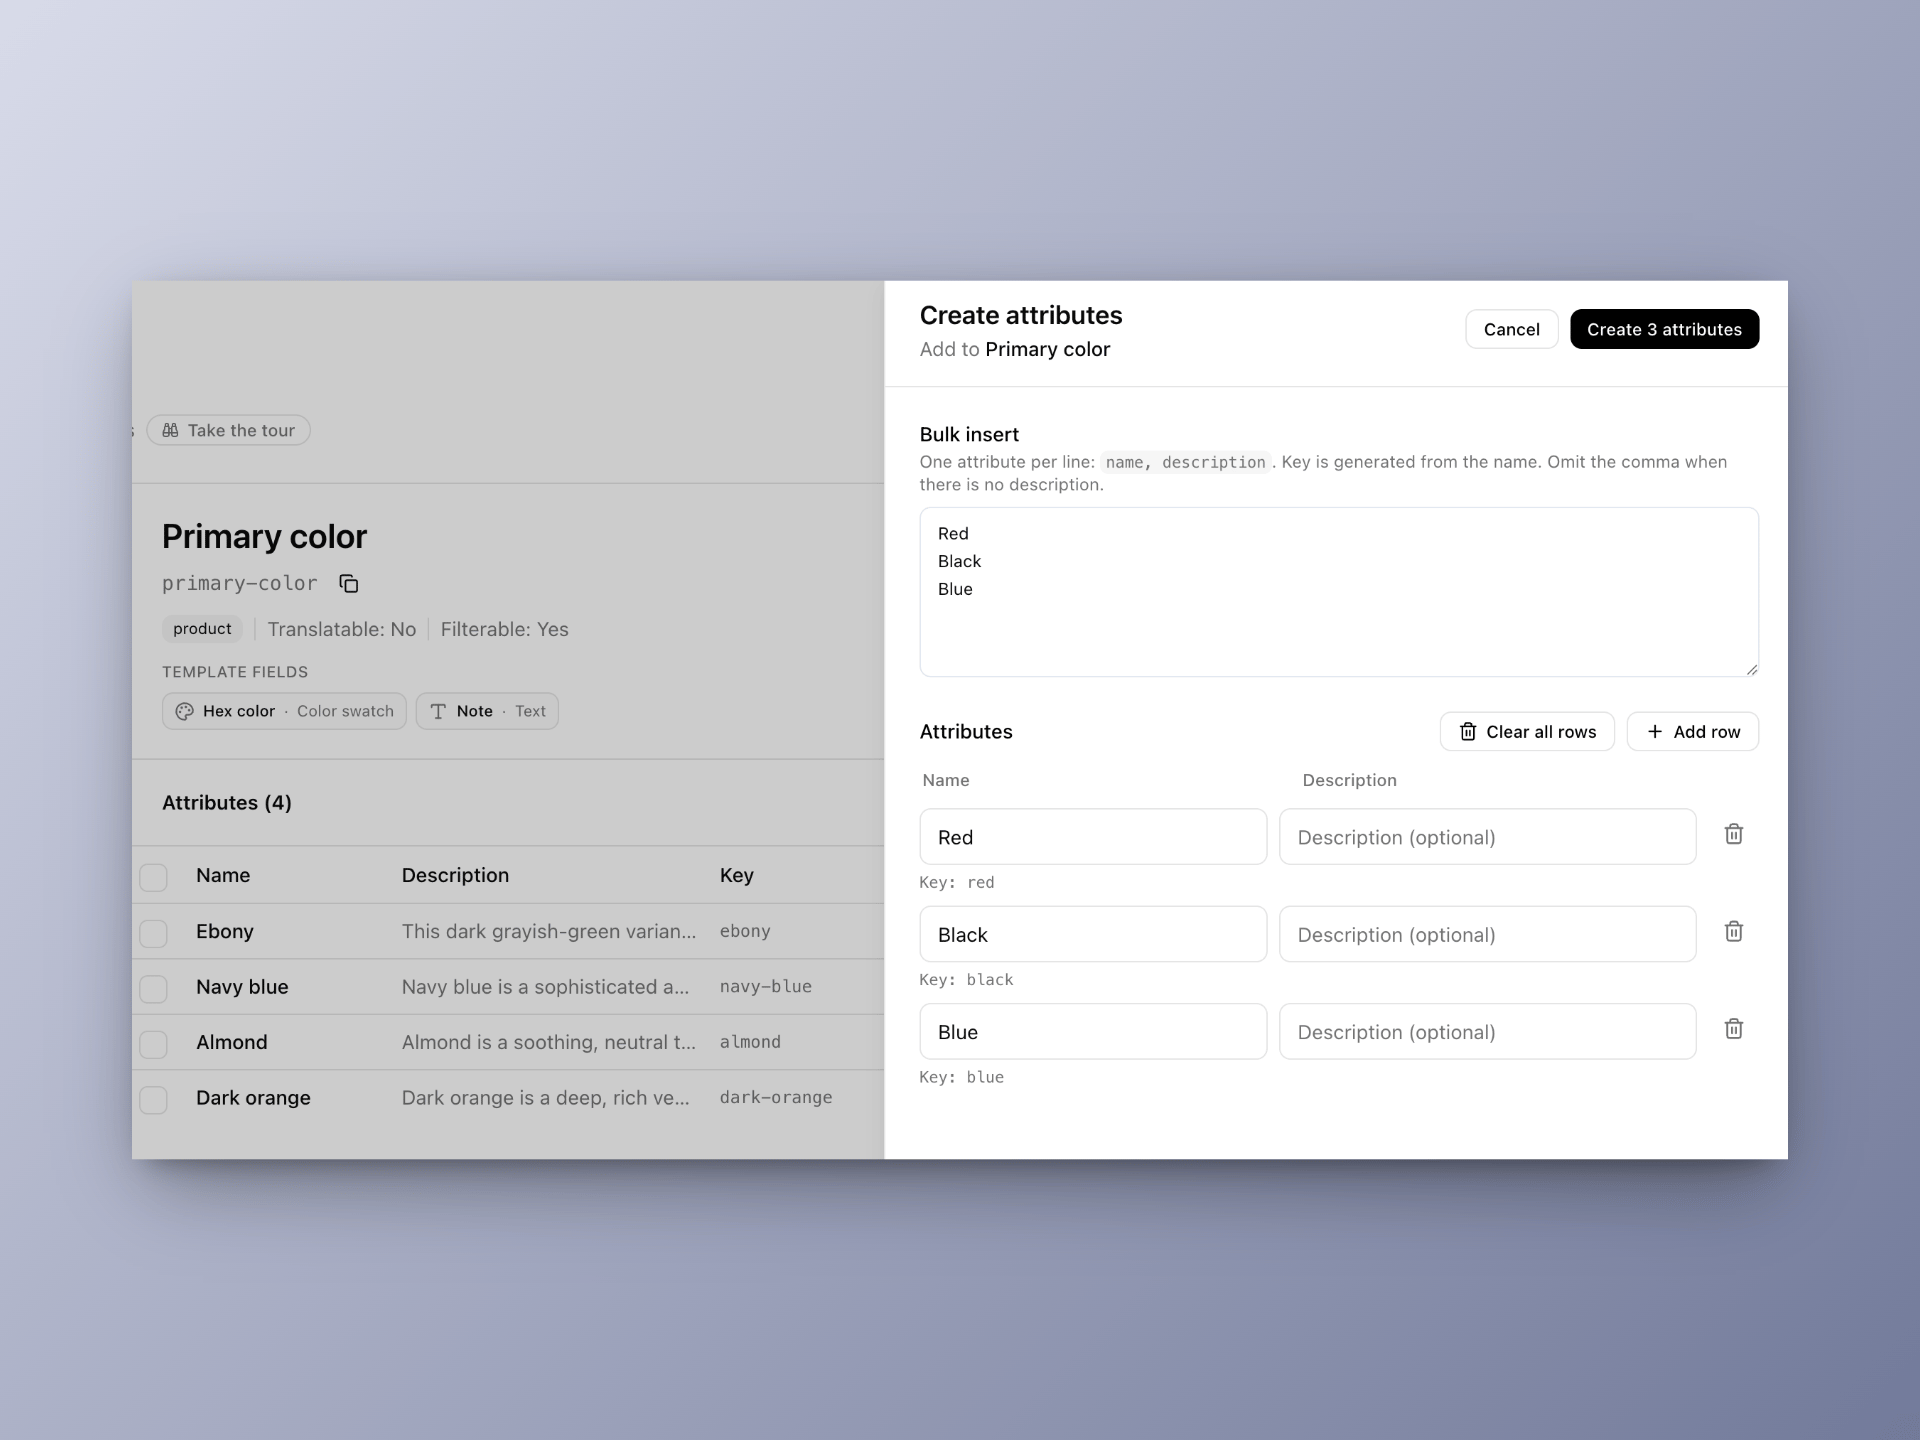
Inside the template, create the individual attributes (the options), e.g. `Red`, `Blue`, `Black`. Bulk creation of attributes is available.
*/}
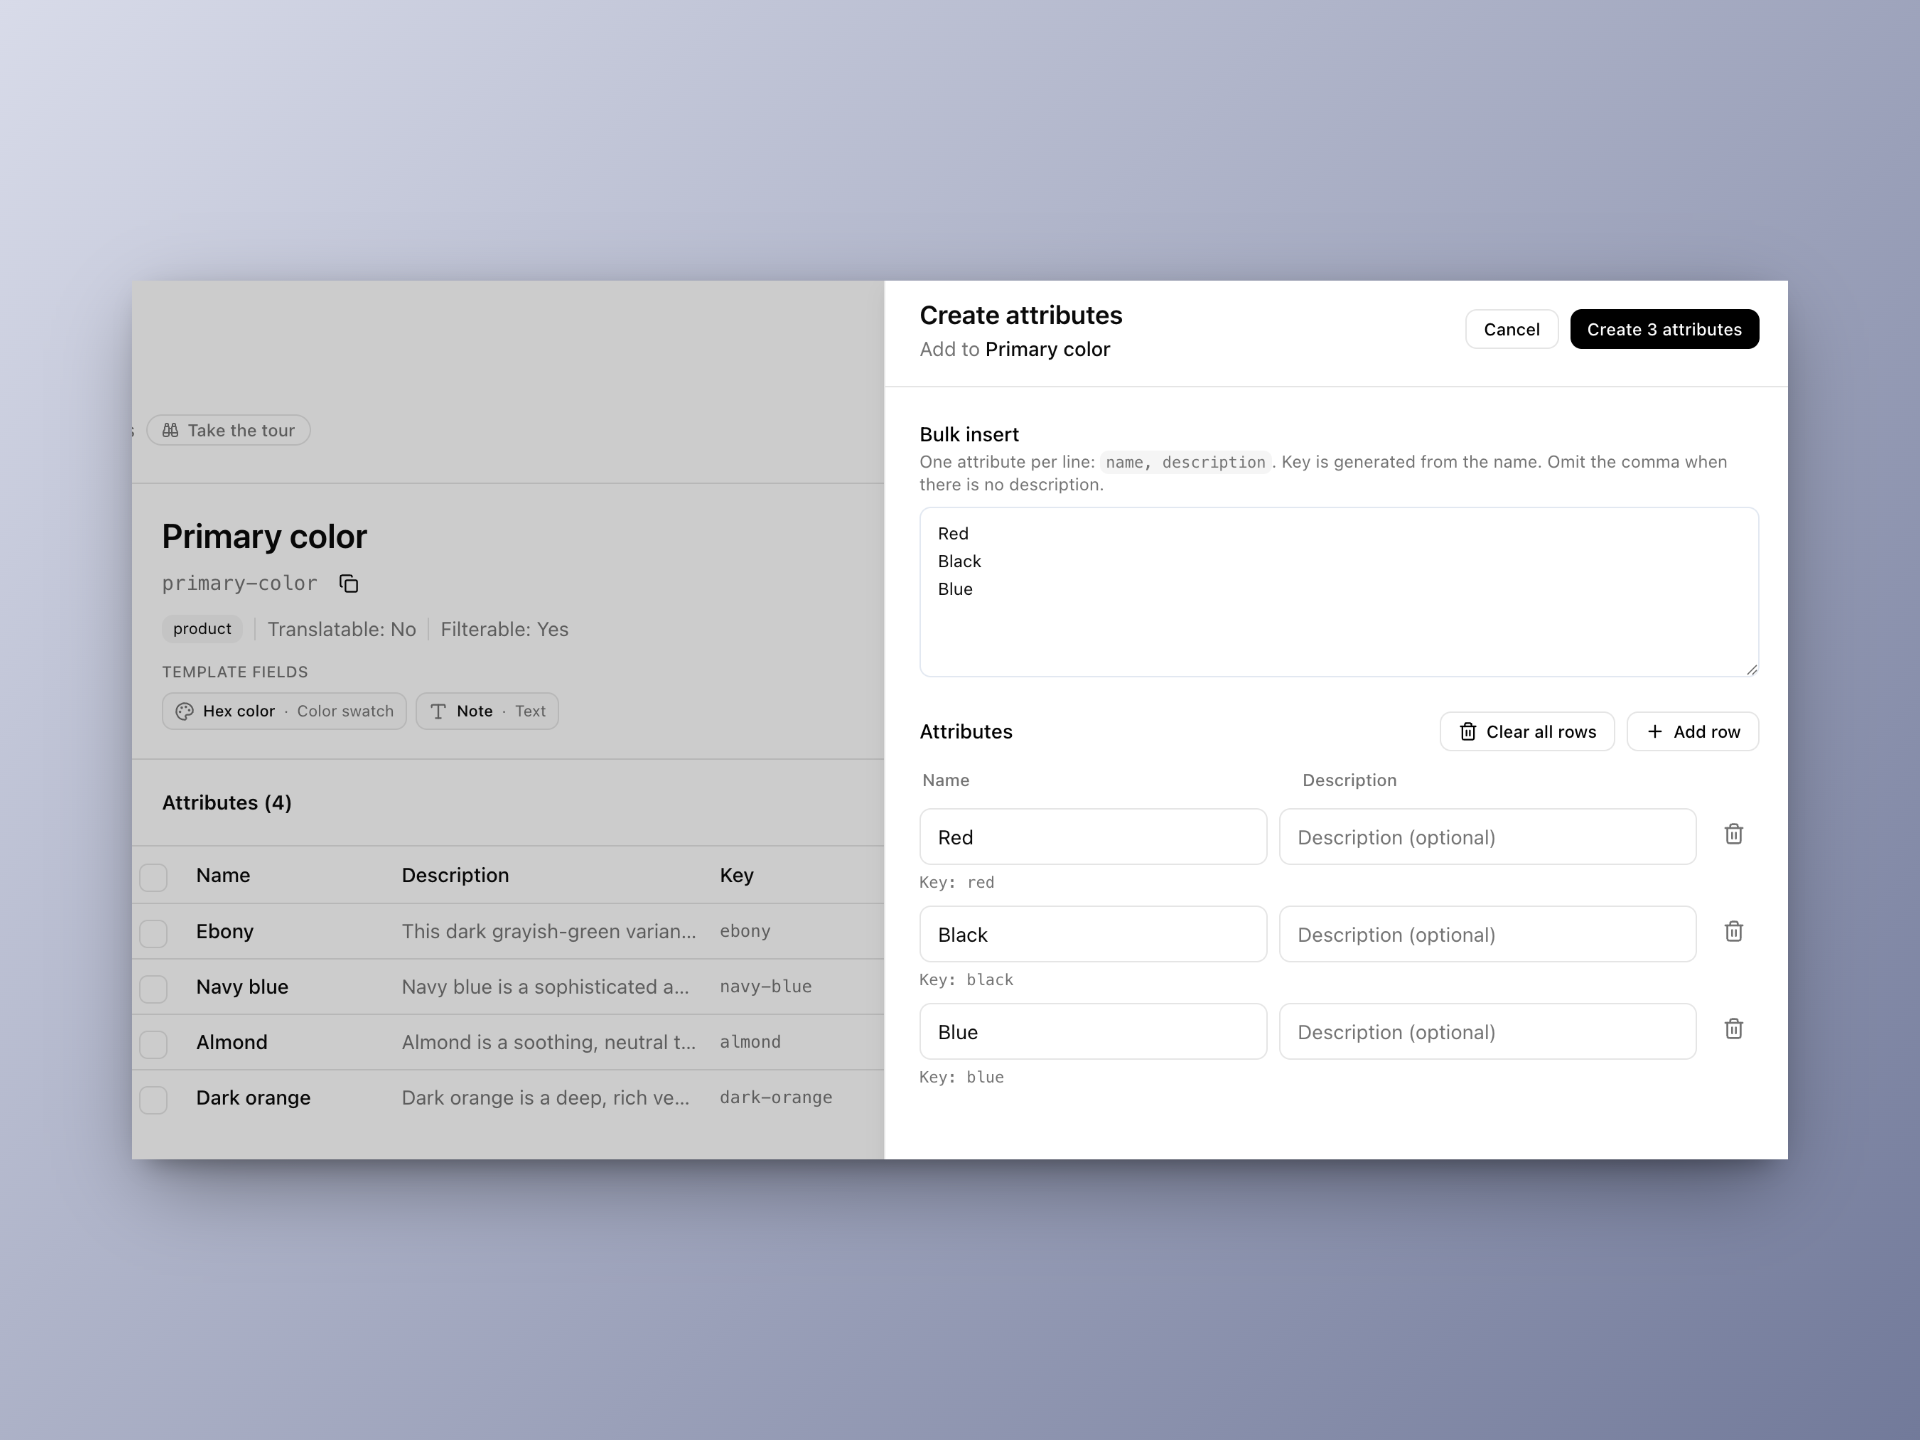
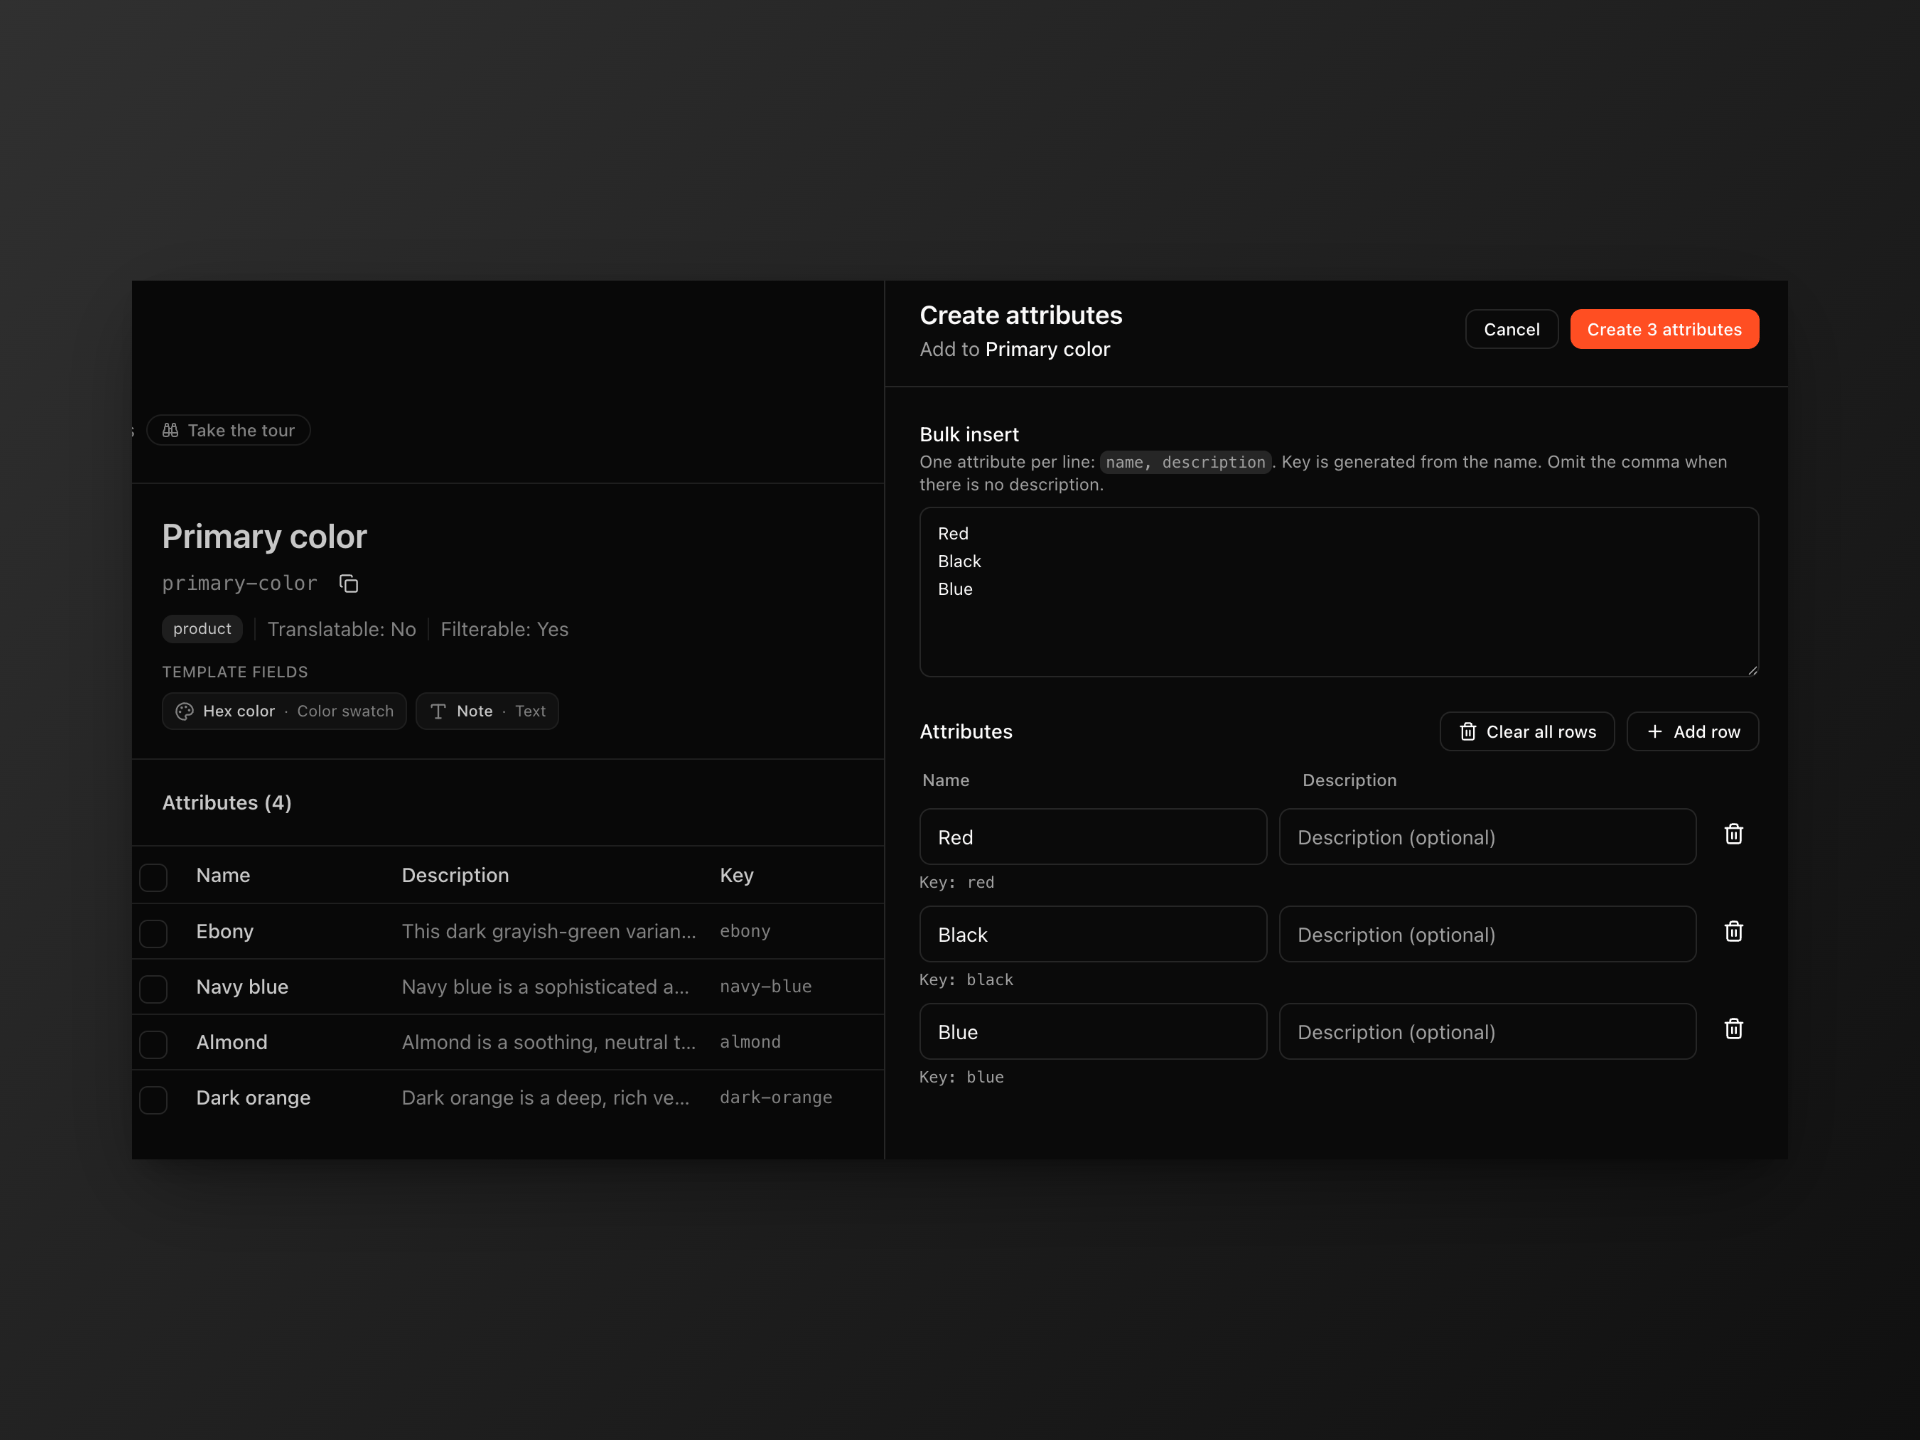
Inside the template, create the individual attributes (the options), e.g. `Red`, `Blue`, `Black`. Bulk creation of attributes is available.
 Open any [supported resource](#supported-resources) the template applies to (for example a product, variant, category, tag, or asset), find the template, and select one or more of its options to attach.
### Attaching and detaching is flexible
Attaching an attribute to an entity simply creates a **link** between them; it doesn't move or copy the underlying data. This has a few useful consequences:
* **Attach freely, in any combination.** The same attribute (e.g. `Color / Forest Green`) can be linked to as many entities as you like, across every resource type the template supports. Each entity can carry as many attributes as it needs.
* **Detaching never deletes data.** Removing an attribute from an entity only breaks that one link. The attribute, its fields, and its values stay safe in the template and remain attached to every other entity that uses it.
* **Edit once, update everywhere.** Because entities point at the same attribute, editing the attribute (for example fixing a hex value or a translation) updates it for every entity it's linked to.
* **The template is the source of truth.** Your attributes and their data always live in the template. Entities just reference them, so you can reorganize what's attached where without ever losing the values themselves.
## Best practices
* **Reuse templates instead of creating duplicates.** One `Color` template with many options is far easier to maintain than separate color fields per product.
* **Use clear, stable names.** The key is derived from the name and is relied on by integrations, so name things well from the start.
* **Mark something filterable only if shoppers should filter by it.** Internal-only data doesn't need to be filterable.
* **Enable translatable early** if you sell in multiple languages, since it's easier than backfilling translations later.
* **Keep fields minimal.** Add fields only when an option genuinely needs extra structured data (like a hex color or an image); otherwise the name and description are enough.
## Working with the API
Everything above is also available programmatically. Attribute templates and attributes have their own endpoints in the Management API, including listing, creating, updating, and deleting templates and options, managing template fields, attaching attributes to items, and linking attributes together.
See the **Attribute Templates** and **Attributes** sections in the [Management API reference](/api-reference/introduction) for the full request and response details.
Open any [supported resource](#supported-resources) the template applies to (for example a product, variant, category, tag, or asset), find the template, and select one or more of its options to attach.
### Attaching and detaching is flexible
Attaching an attribute to an entity simply creates a **link** between them; it doesn't move or copy the underlying data. This has a few useful consequences:
* **Attach freely, in any combination.** The same attribute (e.g. `Color / Forest Green`) can be linked to as many entities as you like, across every resource type the template supports. Each entity can carry as many attributes as it needs.
* **Detaching never deletes data.** Removing an attribute from an entity only breaks that one link. The attribute, its fields, and its values stay safe in the template and remain attached to every other entity that uses it.
* **Edit once, update everywhere.** Because entities point at the same attribute, editing the attribute (for example fixing a hex value or a translation) updates it for every entity it's linked to.
* **The template is the source of truth.** Your attributes and their data always live in the template. Entities just reference them, so you can reorganize what's attached where without ever losing the values themselves.
## Best practices
* **Reuse templates instead of creating duplicates.** One `Color` template with many options is far easier to maintain than separate color fields per product.
* **Use clear, stable names.** The key is derived from the name and is relied on by integrations, so name things well from the start.
* **Mark something filterable only if shoppers should filter by it.** Internal-only data doesn't need to be filterable.
* **Enable translatable early** if you sell in multiple languages, since it's easier than backfilling translations later.
* **Keep fields minimal.** Add fields only when an option genuinely needs extra structured data (like a hex color or an image); otherwise the name and description are enough.
## Working with the API
Everything above is also available programmatically. Attribute templates and attributes have their own endpoints in the Management API, including listing, creating, updating, and deleting templates and options, managing template fields, attaching attributes to items, and linking attributes together.
See the **Attribute Templates** and **Attributes** sections in the [Management API reference](/api-reference/introduction) for the full request and response details.